

Build a declarative billiards simulation with MobX, Canvas, and Konva
We're building a small game. You have 11 glass balls – marbles, if you will. Grab one, throw it at the others, watch them bounce around. There is no score, but it looks cool, and it's a fun way to explore how Konva and React give you interactive Canvas features.
We're using React and Konva to render our 11 marbles on an HTML5 Canvas element, MobX to drive the animation loop, and D3 to help with collision detection. Because this example is declarative, we can split it into two parts:
- Part 1: Rendering the marbles
- Part 2: Building the physics
You can see the finished code on Github and play around with a hosted version of the code you're about to build.
I know this example comes late in the book, and you're feeling like you know all there is to React and visualizations. You can think of this example as practice. Plus it's a good way to learn the basics of MobX.
Decorators
Before we begin, let me tell you about decorators.
MobX embraces them to make its API easier to use. You can use MobX without decorators, but decorators make it better.
A couple years ago, decorators got very close to becoming an official spec, then got held back. I don't know why, but they're a great feature whose syntax is unlikely to change. So even if MobX has to change its implementation when decorators do land in the JavaScript spec, you're not likely to have to change anything.
You can think of decorators as function wrappers. Instead of code like this:
inject("store", ({ store }) => <div>A thing with {store.value}</div>)
You can write the same code like this:
@inject('store')({ store }) => <div>A thing with {store.value}</div>
Not much of a difference, but it becomes better looking when you work with
classes or combine multiple decorators. That's when they shine. No more
})))})) at the end of your functions.
By the way, inject is to MobX much like connect is to Redux. I'll explain
in a bit.
Part 0: Some setup
Because decorators aren't in the JavaScript spec, we have to tweak how we start
our project. We can still use create-react-app, but there's an additional
step.
You should start a new project like this:
$ create-react-app billiards-game --scripts-version custom-react-scripts
This creates a new directory with a full setup for React. Just like you're used to.
The addition of --scripts-version custom-react-scripts employs @kitze's
custom-react-scripts project
to give us more configuration options. Like the ability to enable decorators.
We enable them in the .env file. Add this line:
// billiards-game/.env// ...REACT_APP_DECORATORS=true
No installation necessary. I think custom-react-scripts uses the
transform-decorators-legacy Babel plugin behind the scenes. It's
pre-installed, and we enable it with that .env change.
Before we begin, you should install some other dependencies as well:
$ npm install --save konva react-konva mobx mobx-react \d3-timer d3-scale d3-quadtree
This gives you Konva, MobX, and the parts of D3 that we need. You're now ready to build the billiards game.
A quick MobX primer
Explaining MobX in detail is beyond the scope of this book. You can learn it by osmosis as you follow the code in our billiards example.
That said, here's a quick rundown of the concepts we're using.
MobX is based on reactive programming. There are values that are observable and functions that react when those values change. MobX ensures only the minimal possible set of observers is triggered on every change.
So, we have:
@observable – a property whose changes observers subscribe to @observer – a
component whose render() method observes values @computed – a method whose
value can be fully derived from observables @action – a method that changes
state, analogous to a Redux reducer @inject – a decorator that injects global
stores into a component's props
That's all you need to know. Once your component is an @observer, you never
have to worry about what it's observing. MobX ensures it reacts to changes in
values used during rendering.
Making your component an observer and injecting the global store is the same as
using connect in Redux. It gives your component access to your state, and it
triggers a re-render when something changes.
Importantly, it doesn't trigger a re-render when something that the component isn't using changes. That little tidbit is what makes many other reactive libraries difficult to use.
Part 1: Rendering our marbles
Our marbles render on Canvas using Konva. Each marble is its own sprite rendered as a Konva element. This makes it easier to implement user and marble interactions.
Rendering happens in 3 components:
Appholds everything togetherMarbleListrenders a list of marblesMarblerenders an individual marble
We're also using 2 MobX stores:
Spriteto load the marble sprite and define coordinates withinPhysicsas our physics engine
Sprite and Physics are hold almost all of our game logic. A bit of drag &
drop logic goes in the Marble component. Other than that, all our components
are presentational. They get props and render stuff.
Let's start with App and work our way down.
App
Our App component doesn't do much. It imports MobX stores, triggers sprite
loading, and starts the game loop.
// src/components/App.jsimport React, { Component } from "react"import { Provider as MobXProvider, observer } from "mobx-react"import Physics from "../logic/Physics"import Sprite from "../logic/Sprite"import MarbleList from "./MarbleList"@observerclass App extends Component {componentDidMount() {Sprite.loadSprite(() => Physics.startGameLoop())}render() {return (<div className="App"><div className="App-header"><h2>Elastic collisions</h2><p>Rendered on canvas, built with React and Konva</p></div><div className="App-intro"><MobXProvider physics={Physics} sprite={Sprite}><MarbleList /></MobXProvider></div></div>)}}export default App
We import our dependencies: React itself, a MobXProvider that's similar to
the Redux provider (puts stuff in react context), both of our MobX stores which
export singleton instances, and the main MarbleList component.
App itself is a full featured component that initiates sprite loading in
componentDidMount and calls startGameLoop when the sprite is ready. We know
the sprite is ready because it calls a callback. You'll see how that works in a
bit.
The render method outputs some descriptive text and the MarbleList
component wrapped in a MobXProvider. The provider puts instances of our
stores – sprite and physics – in React context.
This makes them available to all child components via the inject decorator.
MarbleList
MarbleList is an important component that renders the whole game, yet it can
still be small and functional. Every prop it needs comes from our two stores.
Like this:
// src/components/MarbleList.jsimport React from "react"import { inject, observer } from "mobx-react"import { Stage, Layer, Group } from "react-konva"import Marble from "./Marble"const MarbleList = inject("physics","sprite")(observer(({ physics, sprite }) => {const { width, height, marbles } = physicsconst { marbleTypes } = spritereturn (<Stage width={width} height={height}><Layer><Group>{marbles.map(({ x, y, id }, i) => (<Marblex={x}y={y}type={marbleTypes[i % marbleTypes.length]}draggable="true"id={id}key={`marble-${id}`}/>))}</Group></Layer></Stage>)}))export default MarbleList
We import dependencies and create a MarbleList component. Instead of
decorators, we're using with functional composition.
This shows you that MobX can work without decorators, but there's no deep reason behind this choice. Over time, I've developed a preference for composition for functional components and decorators for class-based components.
inject takes values out of context and puts them in component props.
observer declares that our component observes those props and reacts to them.
It's generally a good idea to use both inject and observer together. I have
yet to find a case where you need just one or the other.
The rendering itself takes values out of our stores and returns a Konva Stage
with a single Layer, which contains a Group. Inside this group is our list
of marbles.
Each marble gets a position, a type that defines how it looks, an id, and a
key. We set draggable to true so Konva knows that this element is
draggable.
Yes, that means we get draggability on an HTML5 Canvas without any extra effort. I like that.
Marble
Each Marble component renders a single marble and handles dragging and
dropping. That's how you "shoot" marbles.
Dragging and dropping creates a vector that accelerates, or shoots, the marble in a certain direction with a certain speed. Putting this logic in the component itself makes sense because the rest of our game only cares about that final vector.
The Marble component looks like this:
// src/components/Marble.jsimport React, { Component } from "react"import { Circle } from "react-konva"import { inject, observer } from "mobx-react"@inject("physics", "sprite")@observerclass Marble extends Component {onDragStart = () => {// set drag starting position}onDragMove = () => {// update marble position}onDragEnd = () => {// shoot the marble}render() {const { sprite, type, draggable, id, physics } = this.propsconst MarbleDefinitions = sprite.marbleDefinitionsconst { x, y, r } = physics.marbles[id]return (<Circlex={x}y={y}radius={r}fillPatternImage={sprite.sprite}fillPatternOffset={MarbleDefinitions[type]}fillPatternScale={{ x: (r * 2) / 111, y: (r * 2) / 111 }}shadowColor={MarbleDefinitions[type].c}shadowBlur="15"shadowOpacity="1"draggable={draggable}onDragStart={this.onDragStart}onDragEnd={this.onDragEnd}onDragMove={this.onDragMove}ref="circle"/>)}}export default Marble
We @inject both stores into our component and make it an @observer. The
render method takes values out of our stores and renders a Konva Circle.
The circle uses a chunk of our sprite as its background, has a colorful shadow,
and has a bunch of drag callbacks.
Those callbacks make our game playable.
In onDragStart, we store the starting position of the dragged marble. In
onDragMove, we update the marble's position in the store, which makes it
possible for other marbles to bounce off of ours while it's moving, and in
onDragEnd, we shoot the marble.
Shoot direction depends on how we dragged. That's why we need the starting positions.
Drag callbacks double as MobX actions. Makes our code simpler. Instead of
specifying an extra @action in the MobX store, we manipulate the values
directly.
MobX makes this okay. It keeps everything in sync and our state easy to understand. MobX even batches value changes before triggering re-renders.
The code inside those callbacks is pretty mathsy.
// src/components/Marble.jsclass Marble extends Component {onDragStart = () => {const { physics, id } = this.propsthis.setState({origX: physics.marbles[id].x,origY: physics.marbles[id].y,startTime: new Date(),})}onDragMove = () => {const { physics, id } = this.propsconst { x, y } = this.refs.circle.attrsphysics.marbles[id].x = xphysics.marbles[id].y = y}onDragEnd = () => {const { physics } = this.props,circle = this.refs.circle,{ origX, origY } = this.state,{ x, y } = circle.attrsconst delta_t = new Date() - this.state.startTime,dist = (x - origX) ** 2 + (y - origY) ** 2,v = Math.sqrt(dist) / (delta_t / 16) // distance per frame (= 16ms)physics.shoot({x: x,y: y,vx: (x - origX) / (v / 3), // /3 is a speedup factorvy: (y - origY) / (v / 3),},this.props.id)}// ...}
In onDragStart, we store original coordinates and start time in local state.
These are temporary values that nothing outside this user action cares about.
Local state makes sense.
We'll use them to determine how far the user dragged our marble.
In onDragMove we update the MobX store with new coordinates for this
particular marble. You might think we're messing with mutable state here, and
we might be, but these are MobX observables. They're wrapped in setters that
ensure everything is kept in sync, changes logged, observers notified, etc.
onDragEnd shoots the marble. We calculate drag speed and direction, then we
call the shoot() action on the physics store.
The math we're doing is called euclidean distance by the way. Distance between two points is the root of the sum of squares of distance on each axis.
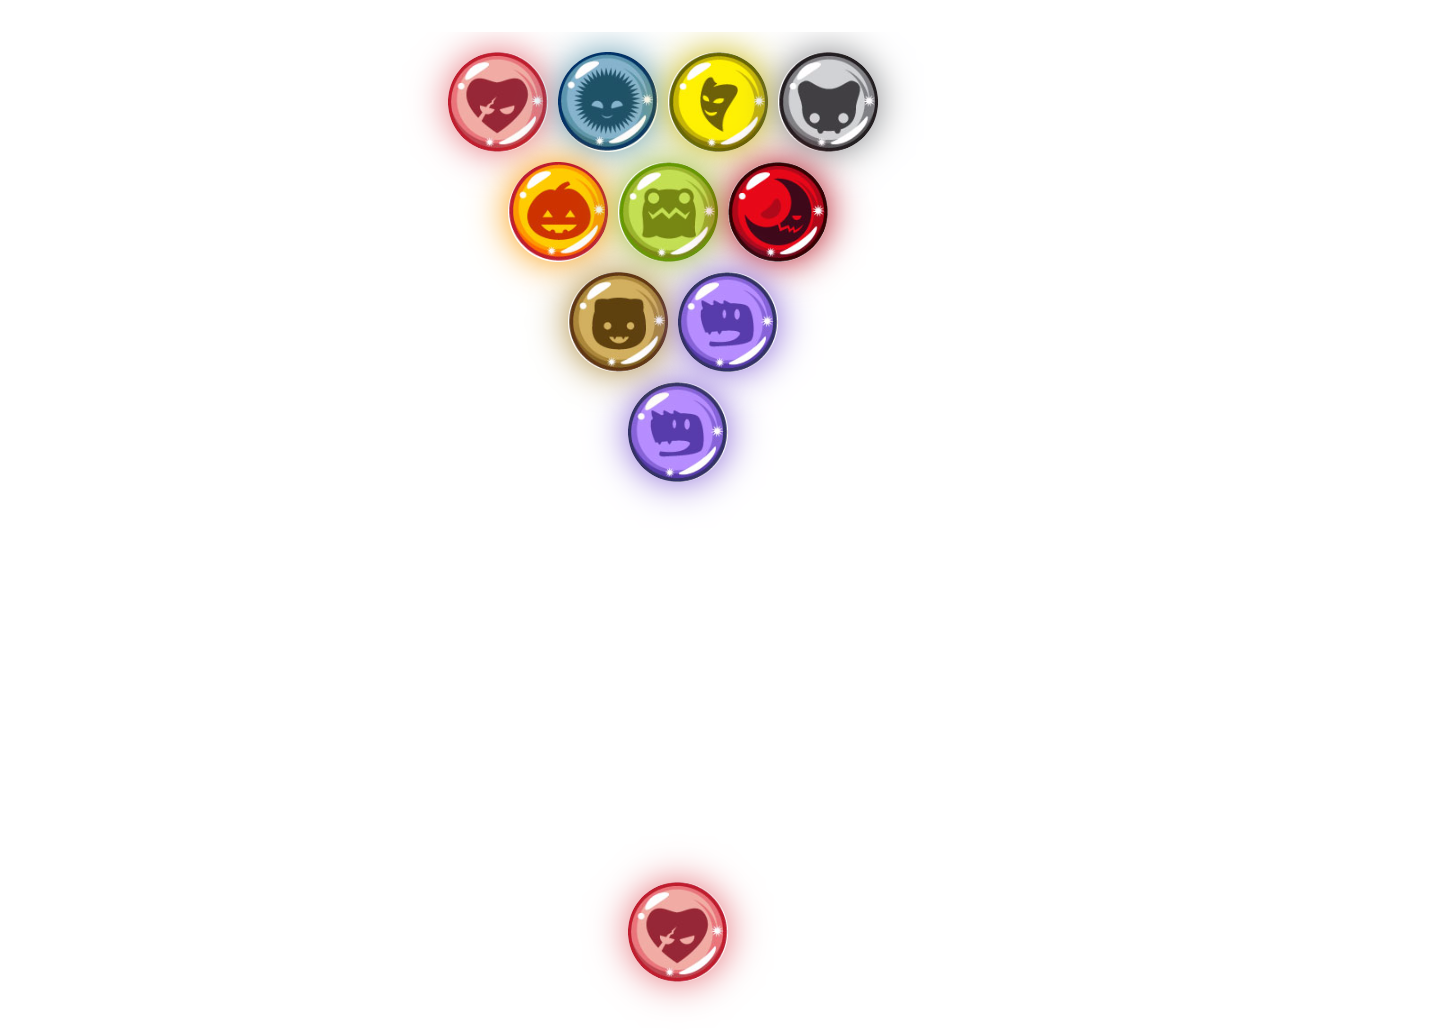
Sprite store
Now that we know how rendering works, we need to load our sprite. It's an icon set I bought online. Can't remember where or who from.
Here's what it looks like:
![]()
To use this sprite, we need two things:
- A way to tell where on the image each marble lies
- A MobX store that loads the image into memory
The first is a MarbleDefinitions dictionary. We used it in Marble
component's render method. If you're playing along, you should copy paste this.
Too much typing 😃
// src/logic/Sprite.jsconst MarbleDefinitions = {dino: { x: -222, y: -177, c: "#8664d5" },redHeart: { x: -222, y: -299, c: "#e47178" },sun: { x: -222, y: -420, c: "#5c96ac" },yellowHeart: { x: -400, y: -177, c: "#c8b405" },mouse: { x: -400, y: -299, c: "#7d7e82" },pumpkin: { x: -400, y: -420, c: "#fa9801" },frog: { x: -576, y: -177, c: "#98b42b" },moon: { x: -575, y: -299, c: "#b20717" },bear: { x: -576, y: -421, c: "#a88534" },}export { MarbleDefinitions }
Each type of marble has a name, a coordinate, and a color. The coordinate tells us where on the sprite image it is, and the color helps us create a nice shadow.
All values painstakingly assembled by hand. You're welcome. :relieved:
The MobX store that loads our sprite into memory and helps us use it looks like this:
// src/logic/Sprite.jsimport { observable, action, computed } from "mobx"import MarbleSprite from "../monster-marbles-sprite-sheets.jpg"class Sprite {@observable sprite = null@action loadSprite(callback = () => null) {const sprite = new Image()sprite.src = MarbleSpritesprite.onload = () => {this.sprite = spritecallback()}}@computed get marbleTypes() {return Object.keys(MarbleDefinitions)}@computed get marbleDefinitions() {return MarbleDefinitions}}export default new Sprite()
A MobX store is a JavaScript object. It has @observable values, @actions,
and @computed getters. That's all there is to it.
No complicated reducers and action generators. Just JavaScript functions and properties. There's plenty going on behind the scenes, but we don't have to think about it.
That's why I like MobX more than Redux. Feels easier to use 🤫
In the Sprite store, we have an @observable sprite. Changing this value
triggers a re-render in al @observer components that rely on it. In our case
that's every marble.
Then we have a loadSprite action. It creates a new Image object and loads
the sprite. After the image loads, we set this.sprite.
The @computed getters make it easier to access MarbleDefinitions.
marbleTypes gives us a list of available types of marbles and
marbleDefinitions returns the definitions object.
Running your code won't work just yet. We need the physics store first because it defines marble positions.
Part 2: Building the physics
Our whole physics engine fits into a single MobX store. It contains the collision detection, marble movement calculations, and drives the game loop itself.
The general approach goes like this:
- Have an observable array of marbles
- Run a
simulationStepon eachrequestAnimationFrameusingd3.timer - Change marble positions and speed
- MobX observables and observers trigger re-renders of marbles that move
The whole Physics store is some 120 lines of code. We'll go slow. Here's the skeleton:
// src/logic/Physics.jsclass Physics {@observable MarbleR = 25@observable width = 800@observable height = 600@observable marbles = []timer = null@computed get initialPositions() {}@action startGameLoop() {}@action simulationStep() {}@action shoot({ x, y, vx, vy }, i) {}}
We have four observable properties, a timer, a @computed property for
initial positions, and 3 actions. startGameLoop starts our game,
simulationStep holds the main logic, and shoot shoots a particular marble.
Let's walk through.
initialPositions
// src/logic/Physics.jsclass Physics {// ..@computed get initialPositions() {const { width, height, MarbleR } = this,center = width / 2const lines = 4,maxY = 200let marbles = range(lines, 0, -1).map((y) => {if (y === lines)return [{ x: center, y: maxY, vx: 0, vy: 0, r: this.MarbleR }]const left = center - y * (MarbleR + 5),right = center + y * (MarbleR + 5)return range(left, right, MarbleR * 2 + 5).map((x) => ({x: x,y: maxY - y * (MarbleR * 2 + 5),vx: 0,vy: 0,r: this.MarbleR,}))}).reduce((acc, pos) => acc.concat(pos), [])marbles = [].concat(marbles, {x: width / 2,y: height - 150,vx: 0,vy: 0,r: this.MarbleR,})marbles.forEach((m, i) => (marbles[i].id = i))return marbles}// ..}
Believe it or not, this is like one of those "Arrange things in a triangle" puzzles you'd see in an old Learn How To Program book. Or a whiteboard interview.
It took me 3 hours to build. Easy to get wrong, fiddly to implement.
We start with a range of numbers. From lines to 0 in descending order. We
iterate through this list of rows and change each into a list of marbles.
4 marbles in the first row, 3 in the next, all the way down to 1 in last row.
For each row, we calculate how much space we have on the left and right of
the center and make a range of horizontal positions from left to right
with a step of "1 marble size". Using these positions and the known row, we
create marbles as needed.
We use a .reduce to flatten nested arrays and add the last marble. That's a
corner case I couldn't solve elegantly, but I'm sure it's possible.
In the end, we add an id to each marble. We're using index as the id, that's
true, but that still ensures we use consistent values throughout our app.
Positions in the array may change.
shoot and startGameLoop
// src/logic/Physics.jsclass Physics {// ...@action startGameLoop() {this.marbles = this.initialPositionsthis.timer = timer(() => this.simulationStep())}// ...@action shoot({ x, y, vx, vy }, i) {const maxSpeed = 20this.marbles[i].x = xthis.marbles[i].y = ythis.marbles[i].vx = vx < maxSpeed ? vx : maxSpeedthis.marbles[i].vy = vy < maxSpeed ? vy : maxSpeed}}
shoot and startGameLoop are the simplest functions in our physics engine.
startGameLoop gets the initial marbles array and starts a D3 timer. shoot
updates a specific marble's coordinates and speed vector.
👌
simulationStep – where collisions collision
Here comes the fun part. The one with our game loop.
There's also a video explaining how this works 👉 Watch it on YouTube. With hand-drawn sketches that explain the math, and I think that's neat.
@action simulationStep() {const { width, height, MarbleR } = this;const moveMarble = ({x, y, vx, vy, id}) => {let _vx = ((x+vx < MarbleR) ? -vx : (x+vx > width-MarbleR) ? -vx : vx)*.99,_vy = ((y+vy < MarbleR) ? -vy : (y+vy > height-MarbleR) ? -vy : vy)*.99;// nearest marble is a collision candidateconst subdividedSpace = quadtree().extent([[-1, -1],[this.width+1, this.height+1]]).x(d => d.:satisfied:.y(d => d.y).addAll(this.marbles.filter(m => id !== m.id)),candidate = subdividedSpace.find(x, y, MarbleR*2);if (candidate) {// borrowing @air_hadoken's implementation from here:// github.com/airhadoken/game_of_circles/// blob/master/circles.js#L64const cx = candidate.x,cy = candidate.y,normx = cx - x,normy = cy - y,dist = (normx ** 2 + normy ** 2),c = (_vx * normx + _vy * normy) / dist * 2.3;_vx = (_vx - c * normx)/2.3;_vy = (_vy - c * normy)/2.3;candidate.vx += -_vx;candidate.vy += -_vy;candidate.x += -_vx;candidate.y += -_vy;}return {x: x + _vx,y: y + _vy,vx: _vx,vy: _vy}};this.marbles.forEach((marble, i) => {const { x, y, vx, vy } = moveMarble(marble);this.marbles[i].x = x;this.marbles[i].y = y;this.marbles[i].vx = vx;this.marbles[i].vy = vy;});}
That's a lot of code 😅. Let's break it down.
You can think of simulationStep as a function and a loop. At the bottom,
there is a .forEach that applies a moveMarble function to each marble.
this.marbles.forEach((marble, i) => {const { x, y, vx, vy } = moveMarble(marble)this.marbles[i].x = xthis.marbles[i].y = ythis.marbles[i].vx = vxthis.marbles[i].vy = vy})
We iterate over the list of marbles, feed them into moveMarble, get new
properties, and save them in the main marbles array. MobX should allows us to
change these values inside moveMarble and let MobX observables do the heavy
lifting, but more explicit code is easier to read.
moveMarble
moveMarble is itself a hairy function. Stuff happens in 3 steps:
- Handle collisions with walls
- Find collision with closest other marble
- Handle collision with marble
Handling collisions with walls happens in two lines of code. One per axis.
let _vx = (x + vx < MarbleR ? -vx : x + vx > width - MarbleR ? -vx : vx) * 0.99,_vy = (y + vy < MarbleR ? -vy : y + vy > height - MarbleR ? -vy : vy) * 0.99
Nested ternary expressions are kinda messy, but good enough. If a marble is
beyond any boundary, we reverse its direction. We always apply a .99
friction coefficient so that marbles slow down.
Finding collisions with the next closest marble happens using a quadtree. Since we don't have too many marbles, we can build a new quadtree every time.
{aside} A quadtree is a way to subdivide space into areas. It lets us answer the question of "What's close enough to me to possibly touch me?" without making too many position comparisons.
Checking every marble with every other marble produces 81 comparisons. Versus 2 comparisons using a quadtree. {/aside}
// nearest marble is a collision candidateconst subdividedSpace = quadtree().extent([[-1, -1],[this.width+1, this.height+1]]).x(d => d.:satisfied:.y(d => d.y).addAll(this.marbles.filter(m => id !== m.id)),candidate = subdividedSpace.find(x, y, MarbleR*2);
We're using d3-quadtree for the quadtree
implementation. It takes an extent, which tells it how big our space is. An
x and y accessor tells it how to get coordinates out of our marble objects,
and we use addAll to fill the quadtree with marbles.
To avoid detecting each marble as colliding with itself, we take each marble out of our list before feeding the quadtree.
Once we have a quadtree, we use .find to look for the nearest marble within
two radiuses – MarbleR*2 – of the current marble. That's exactly the one
we're colliding with! 😄
Handling collisions with marbles involves math. The sort of thing you think you remember from high school, and suddenly realize you don't when the time comes to use it.
Code looks like this:
if (candidate) {// borrowing @air_hadoken's implementation from here:// github.com/airhadoken/game_of_circles/// blob/master/circles.js#L64const cx = candidate.x,cy = candidate.y,normx = cx - x,normy = cy - y,dist = normx ** 2 + normy ** 2,c = ((_vx * normx + _vy * normy) / dist) * 2.3_vx = (_vx - c * normx) / 2.3_vy = (_vy - c * normy) / 2.3candidate.vx += -_vxcandidate.vy += -_vycandidate.x += -_vxcandidate.y += -_vy}return {x: x + _vx,y: y + _vy,vx: _vx,vy: _vy,}
Ok, the return statement isn't about handling collisions. It updates the
current marble.
The rest looks like magic. I implemented it and it still looks like magic.
You can think of [normx, normy] as a vector that points from current marble
to collision candidate. It gives us bounce direction. We use the
euclidean distance formula
to calculate the length of this vector. The distance between the centers of
both marbles.
Then we calculate the dot product
between our marble's speed vector and the collision direction vector. And we
normalize it by distance. Multiplying distance by 2 accounts for there being
two marbles in the collision. That extra .3 made the simulation look better.
Fiddling and experimentation are your best tools for magic values like that 😉
Then we use the dot product scalar to adjust the marble's speed vector.
Dividing by 2 takes into account that half the energy goes to the other
marble. This is true because we assume their masses are equal.
Finally, we update the candidate marble and make sure it bounces off as well.
We do it additively because that's how it happens in real life.
Two marbles traveling towards each other in exactly opposite directions with exactly the same speed, will stop dead and stay there. As soon as there's any misalignment, deflection happens. If one is stationary, it starts moving. If it's moving in the same direction, it speeds up… etc.
The end result is a decent-looking simulation of billiards.