

Make it work in the real world 🚀
You've built a great visualization. Congratz! Time to put it online and share with the world. 🤘
To do that, we're going to use Github Pages because our app is a glorified static website. There's no backend, so all we need is something to serve our HTML, JavaScript, and CSV. Github Pages is perfect for that.
It's free, works well with create-react-app, and can withstand a lot of
traffic. You don't want to worry about traffic when your app gets to the top of
HackerNews or Reddit.
There are a few things we should take care of:
- setting up deployment
- adding a page title
- adding some copy
- Twitter and Facebook cards
- an SEO tweak for search engines
- use the full dataset
Rudimentary routing
Imagine this. A user finds your dataviz, clicks around, and finds an interesting insight. They share it with their friends.
"See! I was right! This link proves it."
"Wtf are you talking about?"
"Oh… uuuuh… you have to click this and then that and then you'll see. I'm legit winning our argument."
"Wow! Kim Kardashian just posted a new snap with her dog."
Let's help our intrepid user out and make our dataviz linkable. We should store
the current filteredBy state in the URL and be able to restore from a link.
There are many ways to achieve this. ReactRouter comes to mind, but the quickest is to implement our own rudimentary routing. We'll add some logic to manipulate and read the URL hash.
The easiest place to put this logic is next to the existing filter logic inside
the Controls component. Better places exist from a "low-down components
shouldn't play with global state" perspective, but that's okay.
// src/components/Controls.jsconst Controls = () => {// ..// change default state to read the location hashlet locationHash = window.location.hash.replace("#", "").split("-");const [filteredBy, setFilteredBy] = useState({year: locationHash[0] || "*",USstate: locationHash[1] || "*",jobTitle: locationHash[2] || "*",});useEffect(() => {let [year, USstate, jobTitle] = window.location.hash.replace("#", "").split("-");if (year !== "*" && year) {updateYearFilter(Number(year));}if (USstate !== "*" && USstate) {updateUSstateFilter(USstate);}if (jobTitle !== "*" && jobTitle) {updateJobTitleFilter(jobTitle);}}, []);// ..reportUpdateUpTheChain() {window.location.hash = [this.state.year || "*",this.state.USstate || "*",this.state.jobTitle || "*"].join("-");// ..}
We use the useEffect hook to read the URL when Controls
first render on our page. Presumably when the page loads, but it could be
later. It doesn't really matter when, just that we update our filter the
first chance we get.
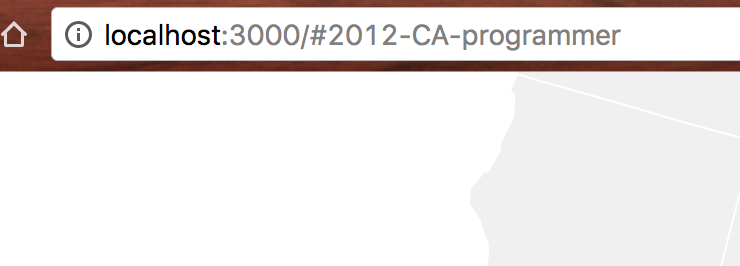
window.location.hash gives us the hash part of the URL. We clean it up and
split it into three parts: year, USstate, and jobTitle. If the URL is
localhost:3000/#2013-CA-manager, then year becomes 2013, USstate
becomes CA, and jobTitle becomes manager.
We make sure each value is valid and use our existing filter update callbacks to update the visualization. Just as if it was the user clicking a button.
In reportUpdateUpTheChain, we make sure to update the URL hash. Assigning a
new value to window.location.hash takes care of that.
You should see the URL changing as you click around.
There's a bug with some combinations in 2013 that don't have enough data. It will go away when we use the full dataset.
Twitter and Facebook cards and SEO
How your visualization looks on social media matters more than you'd think. Does it have a nice picture, a great description, and a title, or does it look like a random URL? Those things matter.
And they're easy to set up. No excuse.
We're going to poke around public/index.html for the first time. Add titles,
Twitter cards, Facebook Open Graph things, and so on.
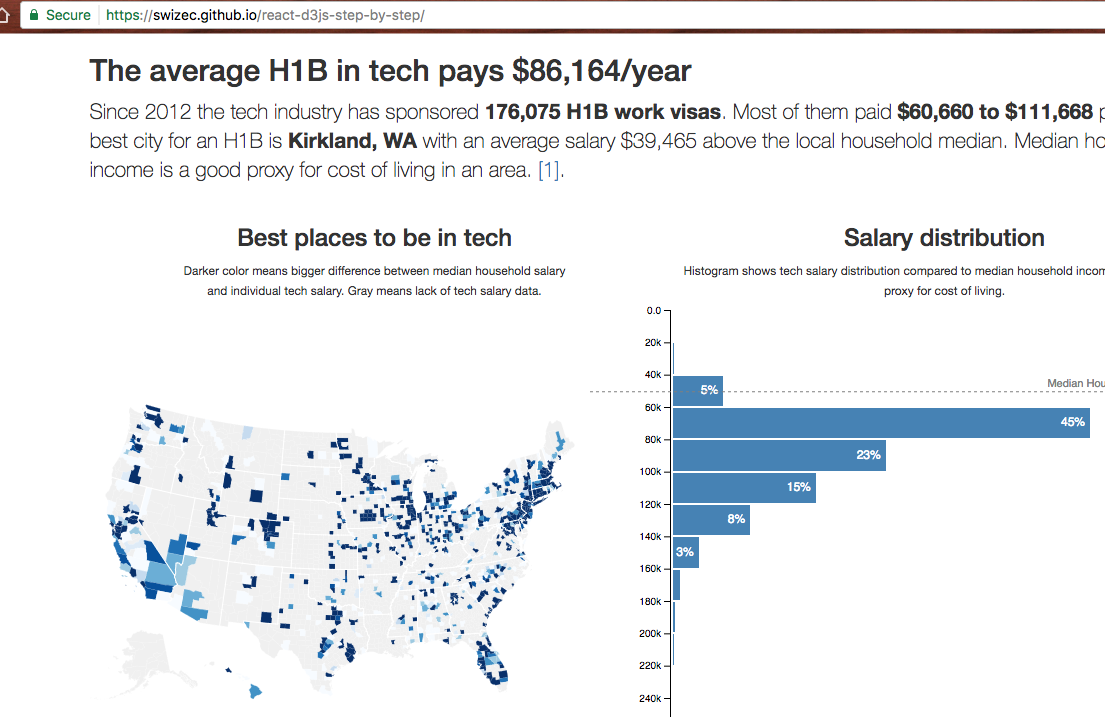
<!-- public/index.html --><head><!-- //... -->// Insert the line(s) between here...<title>How much does an H1B in tech pay?</title><link rel="canonical"href="https://swizec.github.io/react-d3-walkthrough-livecode/" />// ...and here.</head><body><!-- //... --><div id="root">// Insert the line(s) between here...<h2>The average H1B in tech pays $86,164/year</h2><p class="lead">Since 2012 the US tech industry has sponsored 176,075H1B work visas. Most of them paid <b>$60,660 to $111,668</b>per year (1 standard deviation). <span>The best city foran H1B is <b>Kirkland, WA</b> with an average individualsalary <b>$39,465 above local household median</b>.Median household salary is a good proxy for cost ofliving in an area.</span></p>// ...and here.</div></body>
We add a <title> and a canonical URL. Titles configure what shows up in
browser tabs, and the canonical URL is there to tell search engines that this
is the main and most important URL for this piece of content. This is
especially important for when people copy-paste your stuff and put it on other
websites.
In the body root tag, we add some copy-pasted text from our dataviz. You'll recognize the default title and description.
As soon as React loads, these get overwritten with our preloader, but it's good to have them here for any search engines that aren't running JavaScript yet. I think both Google and Bing are capable of running our React app and getting text from there, but you never know.
To make social media embeds look great, we'll use
Twitter card and
Facebook OpenGraph
meta tags. I think most other websites just rely on these since most people use
them. They go in the <head> of our HTML.
<!-- public/index.html --><head><meta property="og:locale" content="en_US" /><meta property="og:type" content="article" /><meta property="og:title"content="The average H1B in tech pays $86,164/year" /><meta property="og:description"content="Since 2012 the US tech industry has sponsored176,075 H1B work visas. With an average individual salaryup to $39,465 above median household income." /><meta property="og:url"content="https://swizec.github.io/react-d3-walkthrough-livecode" /><meta property="og:site_name" content="A geek with a hat" /><meta property="article:publisher"content="https://facebook.com/swizecpage" /><meta property="fb:admins" content="624156314" /><meta property="og:image"content="https://swizec.github.io/react-d3js-step-by-step/thumbnail.png" /><meta name="twitter:card" content="summary_large_image" /><meta name="twitter:description"content="Since 2012 the US tech industry has sponsored176,075 H1B work visas. With an average individual salaryup to $39,465 above median household income." /><meta name="twitter:title"content="The average H1B in tech pays $86,164/year" /><meta name="twitter:site" content="@swizec" /><meta name="twitter:image"content="https://swizec.github.io/react-d3js-step-by-step/thumbnail.png" /><meta name="twitter:creator" content="@swizec" /></head>
Much of this code is repetitive. Both Twitter and Facebook want the same info,
but they're stubborn and won't read each other's formats. You can copy all of
this, but make sure to change og:url, og:site_name, article:publisher,
fb:admins, og:image, twitter:site, twitter:image, and
twitter:creator. They're specific to you.
The URLs you should change to the homepage URL you used above. The rest you
should change to use your name and Twitter/Facebook handles. I'm not sure why
it matters, but I'm sure it does.
An important one is fb:admin. It enables admin features on your site if you
add their social plugins. If you don't, it probably doesn't matter.
You're also going to need a thumbnail image. I made mine by taking a screenshot
of the final visualization, then I put it in public/thumbnail.png.
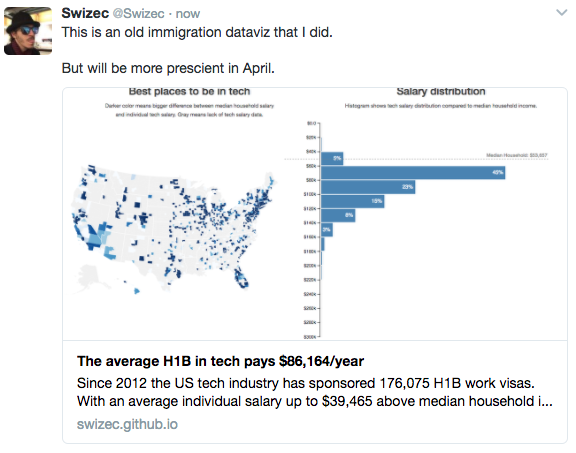
Now when somebody shares your dataviz on Twitter or Facebook, it's going to look something like this:
Full dataset
One more step left. Use the whole dataset!
Go into src/DataHandling.js and change one line:
// src/DataHandling.jsexport const loadAllData = async () => {const datasets = await Promise.all([d3.json("data/us.json"),d3.csv("data/us-county-names-normalized.csv", cleanCounty),d3.csv("data/county-median-incomes.csv", cleanIncome),// change this line hered3.csv("data/h1bs-2012-2016.csv", cleanSalary),d3.tsv("data/us-state-names.tsv", cleanUSStateName),]);
We change the file name, and that's that. Full dataset locked and loaded. Dataviz ready to go.
Launch! 🚀
To show your dataviz to the world, make sure you've committed all changes.
Using git status shows you anything you missed.
The easiest way to deploy webapps these days is using Netlify or Vercel. We'll use Vercel because that's what I like most.
Install it with:
$ npm install -g now
Then run:
$ Now
You'll get some questions and then some output during deploy.
And you're ready to go. Your visualization is online. My URL is
https://swizec.github.io/react-d3-walkthrough-livecode/, yours is different.
Visit it and you'll see what you've built. Share it and others will see it too.
When done you'll get a URL, mine is: https://reactdataviz-project.vercel.app
Congratz! You've built and deployed your first React and D3 dataviz. You're amazing \o/
If that didn't work, consult the full diff on GitHub
A couple more tweaks
You can now update meta data with your URL
And there's a bug with how we filter by US states. You have to change this line in src/components/Controls.js
// src/components/Controls.jsconst updateUSstateFilter = (USstate, reset) => {let USstateFilter = (d) => d.USstate === USstate;
You can see the whole debugging process here. Might give you some ideas for your own debugging process :)
If that didn't work, here's the diff on GitHub
🤘
That's it, you're fantastic. You've built a dataviz dashboard!
next up, animation